- Keyboard layout configuration in KDE can be done in various ways. Probably the easiest one is to work through the KDE Control Center, using the Keyboard Layout module in the Regional & Accessibility category.
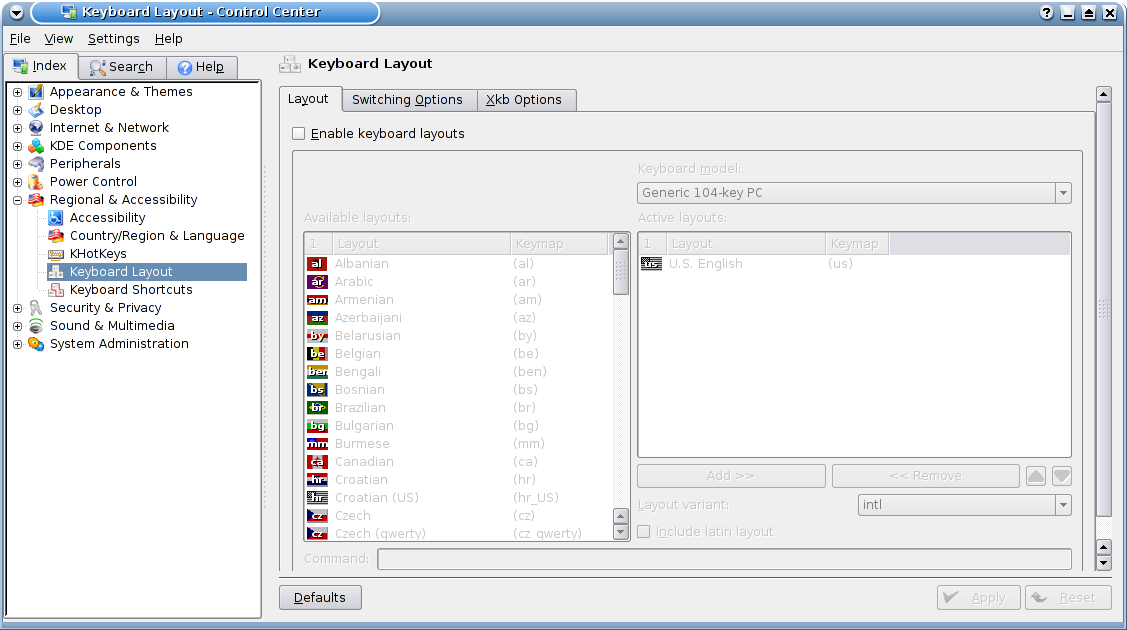
- In contrast to many other systems, the keyboard layout configuration on KDE is extremely simple. First, you may have to make sure keyboard layouts are enabled by clicking the Enable keyboard layouts checkbox. The list on the left shows you which keyboard layouts are available on your computer, and the right list shows you which ones are currently active. Scroll down to the bottom of the left list to find the U.S. International layout, also known as U.S. English w/ deadkeys.
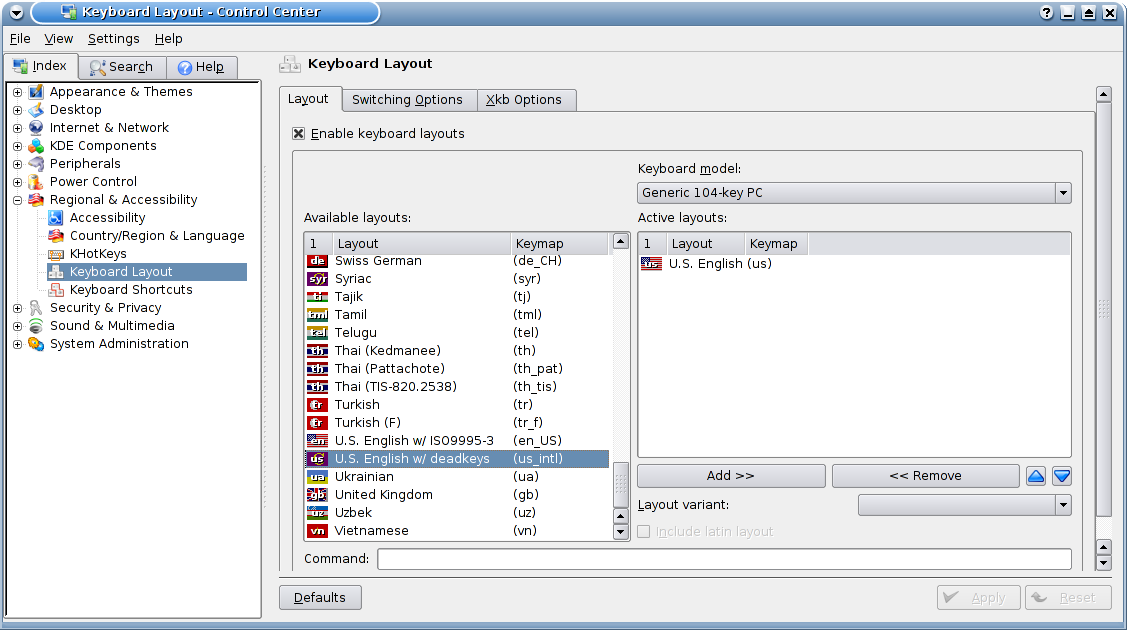
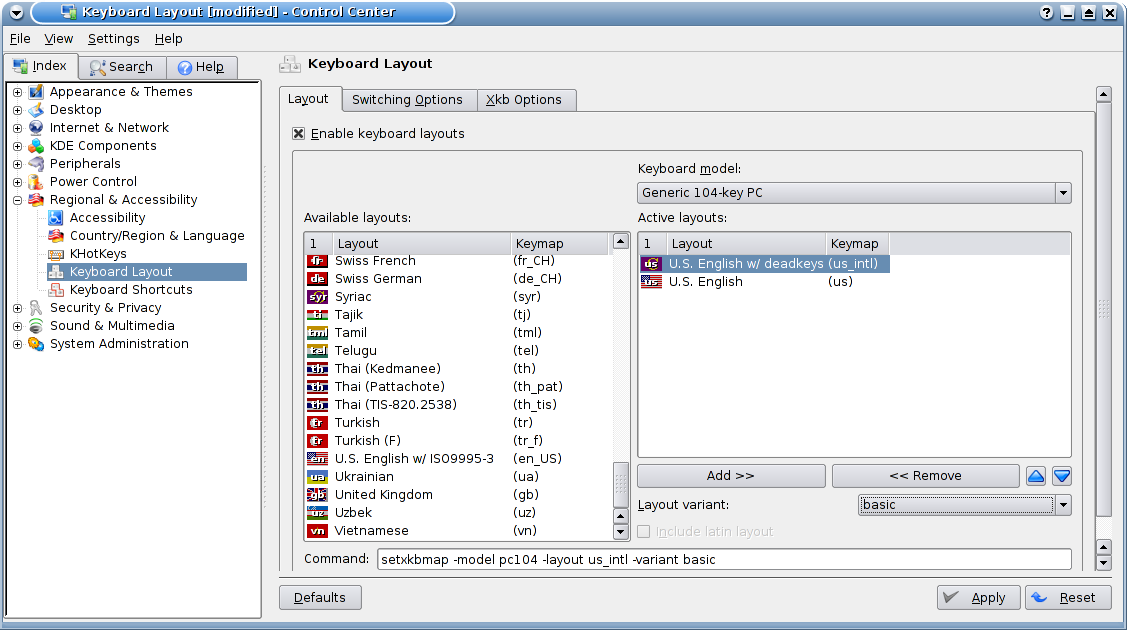
- Click on the Add button to activate the keyboard layout, thereby moving it over into the right list. Now select the new entry in the right list and check the drop-down menu below the list to make sure you're using the basic variant. If you want the new keyboard layout to be the default, use the blue arrow buttons at the bottom right to move it to the top of the list.
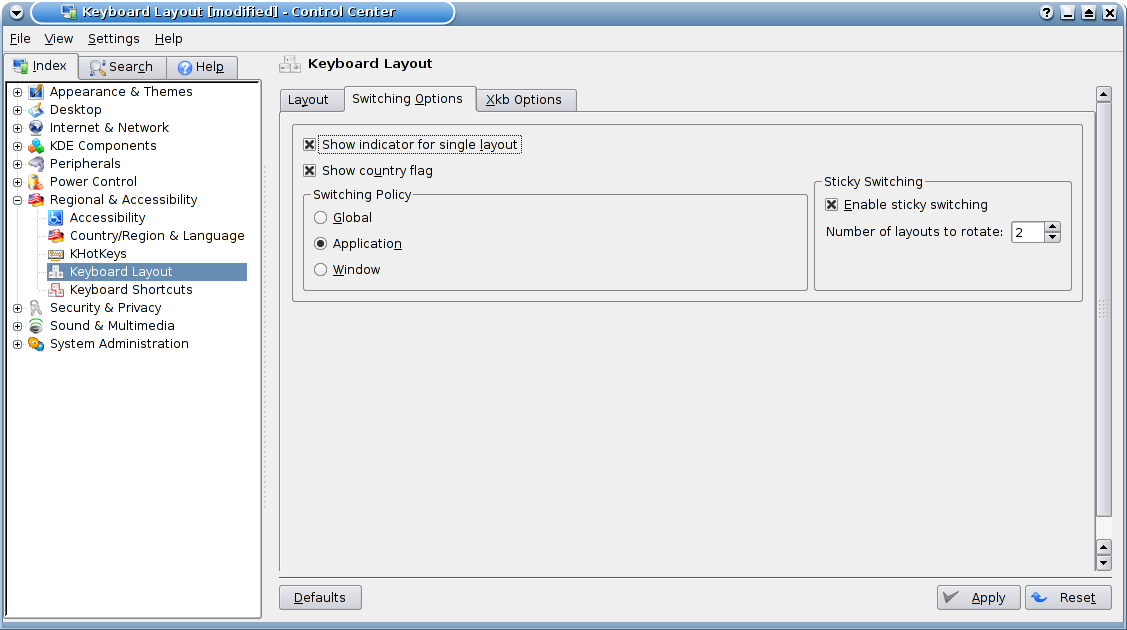
- Now that you've activated the layout, you'll want a way to switch between it and your other layouts. Go over to the Switching Options tab and check out the options.
- Show indicator for single layout: If you check this box, the keyboard layout indicator (see the last step) will show up in the system tray even when there is only one keyboard layout active. You can have this either checked or unchecked, according to your preference.
- Show country flag: Having this checked will make the indicator display the flag of the country associated with the active keyboard layout. It's probably a good idea to check this box, since it's easier to recognize a picture than a couple of letters.
- Switching Policy has three possible values. Global means that the same keyboard layout applies to all of KDE; when you change the keyboard layout, you're changing it for all programs at once. Application means that when you make a change in the keyboard layout, it applies to the active program only. If that program has created multiple windows, then the same change will take effect in all of them. This is a very useful choice, since some programs don't work properly with some keyboard layouts, and it helps to have a way to switch back to a standard keyboard layout when using one of them. And finally, Window is much like the previous choice, except that it applies only to the active window and not to other windows, even if they were created by the same program.
- Enable sticky switching: This is useful when you have more than two active keyboard layouts, but some of them you use only rarely. If this checkbox is checked, when you use the keyboard shortcut or click on the indicator to go to the "next" keyboard layout, it will pretend that the first few keyboard layouts are not in the list; in other words, it will only use one of the last few. You can set the actual number of keyboard layouts that it does rotate through using the spinner. Of course, there are other ways to get to the keyboard layouts that are left out of this rotation.
Once you're done making your choices, click Apply and close the window.
- You'll now notice a small icon showing up in your system tray, near the clock. This is the keyboard layout indicator. Clicking on the indicator or using the keyboard shortcut (Ctrl+Alt+K, by default) lets you change to the next keyboard layout in the list after the current one; you can repeatedly click to get to whatever keyboard layout you want. Or, you can right-click on it to pop up a menu which contains all the available keyboard layouts. Just select a layout from the list to put it into effect, replacing the previous selection. Your new choice stays in effect until you choose another one or you log out of KDE.
